The build process
The Kit
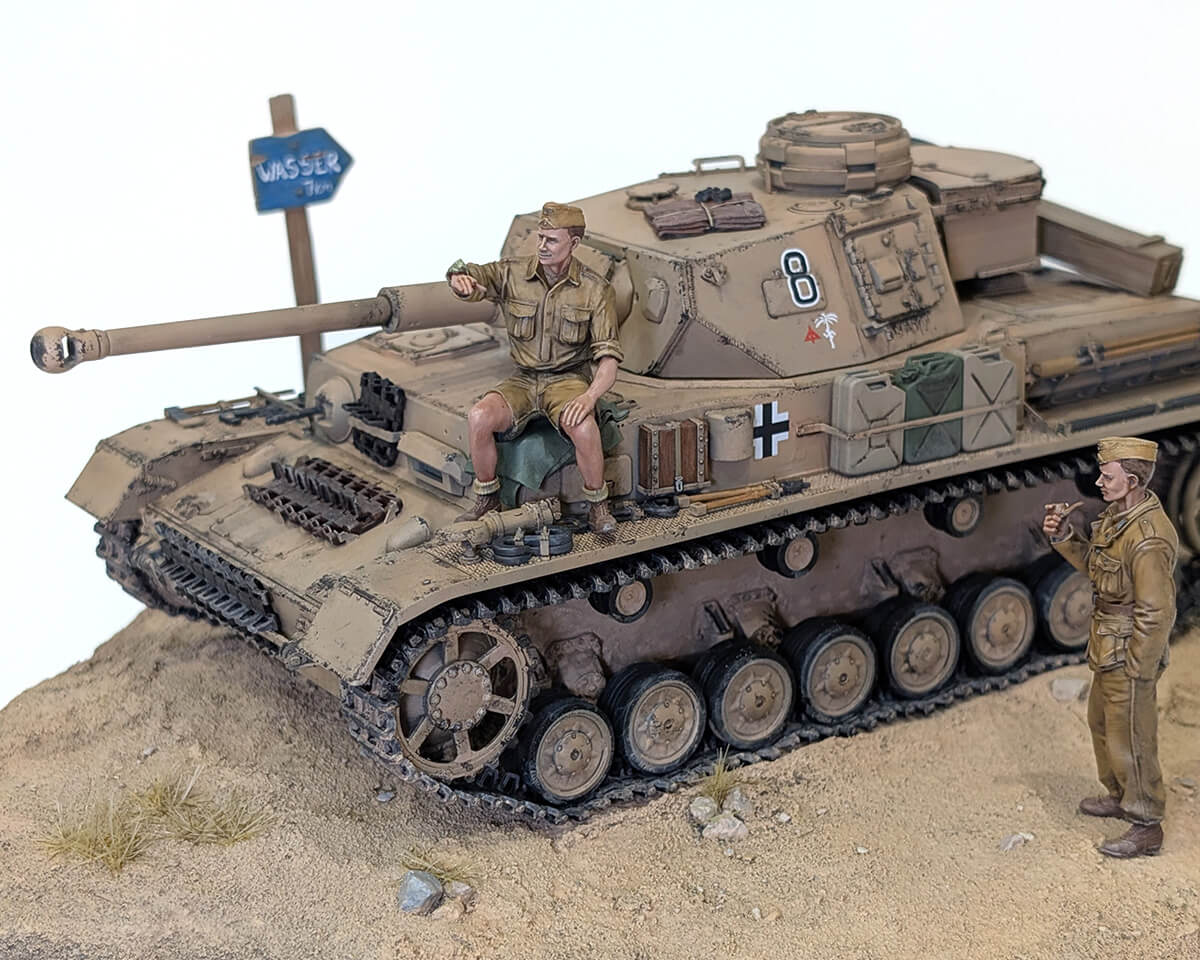
I picked up this kit from the Milton Keynes Model show last year. I went to the show wanting to get something for a DAK scene and also had originally really wanted to do a Stug III. After a little bit of research I found there were very few Stugs in north Africa so I settled on a Panzer III or IV, depending what I could find at the show.
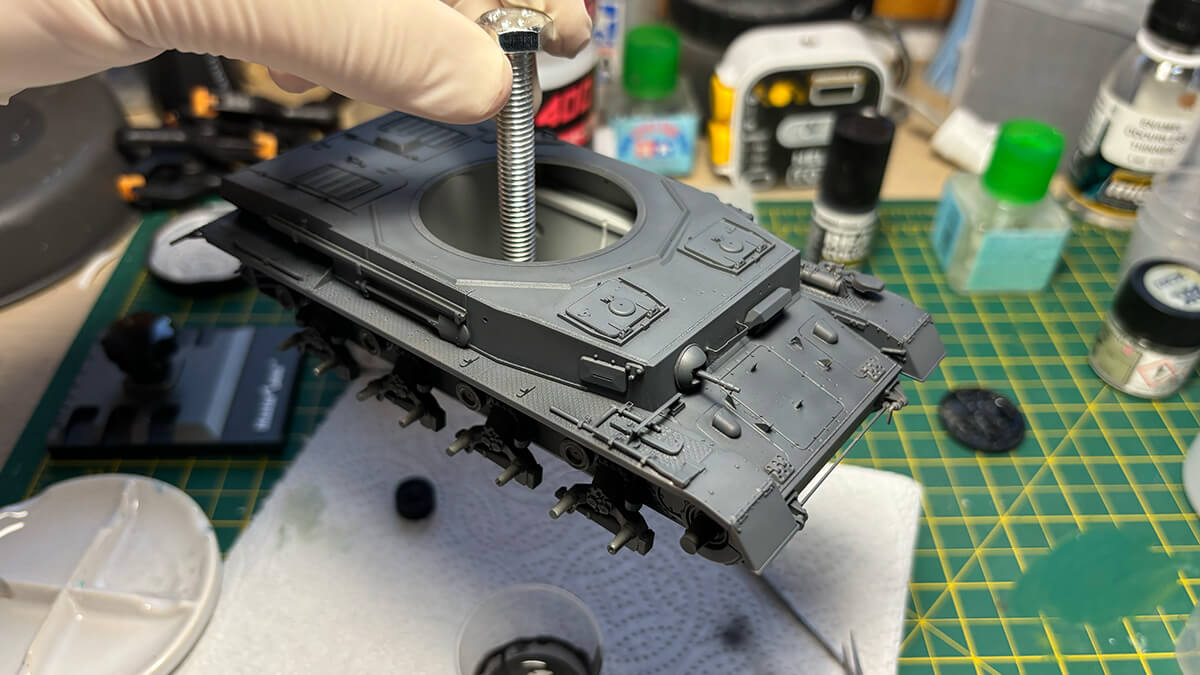
I managed to find a Dragon Smart Kit Pz.Kpfw.IV Ausf.F2(G) for an absolute steal at £30. I've not built a Dragon kit before and I've heard they're a bit like Marmite (depending on the exact kit). I was keen to give one of the good ones a go, and this one did not disappoint.
I also grabbed a couple Panzer Art figures while I was at the show. These resin figures look great.
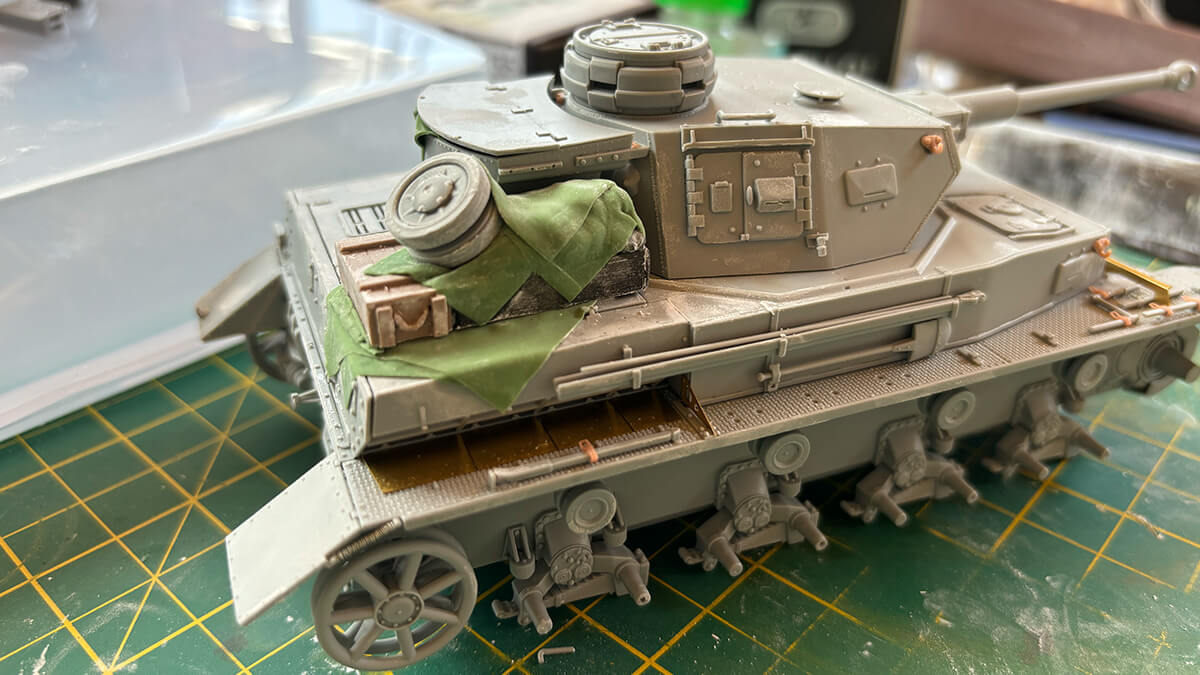
I must of picked one of the good Dragon kits as it was really fun to put together and the fit was great. There are quite a few parts but there is also so much crisp detail. Inspired by panzermeister36 I also ordered some extra goodies to enhance the detail further. These were some 3D printed tool clamps, hooks and headlights. I feel like the tool clamps in particular work really well and feel very in scale. They weren’t too tricky to add either, it just took some careful scraping away of the moulded on ones.
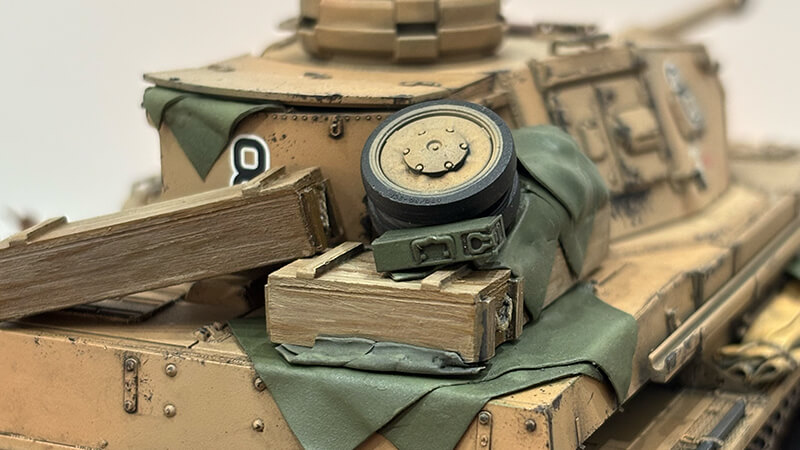
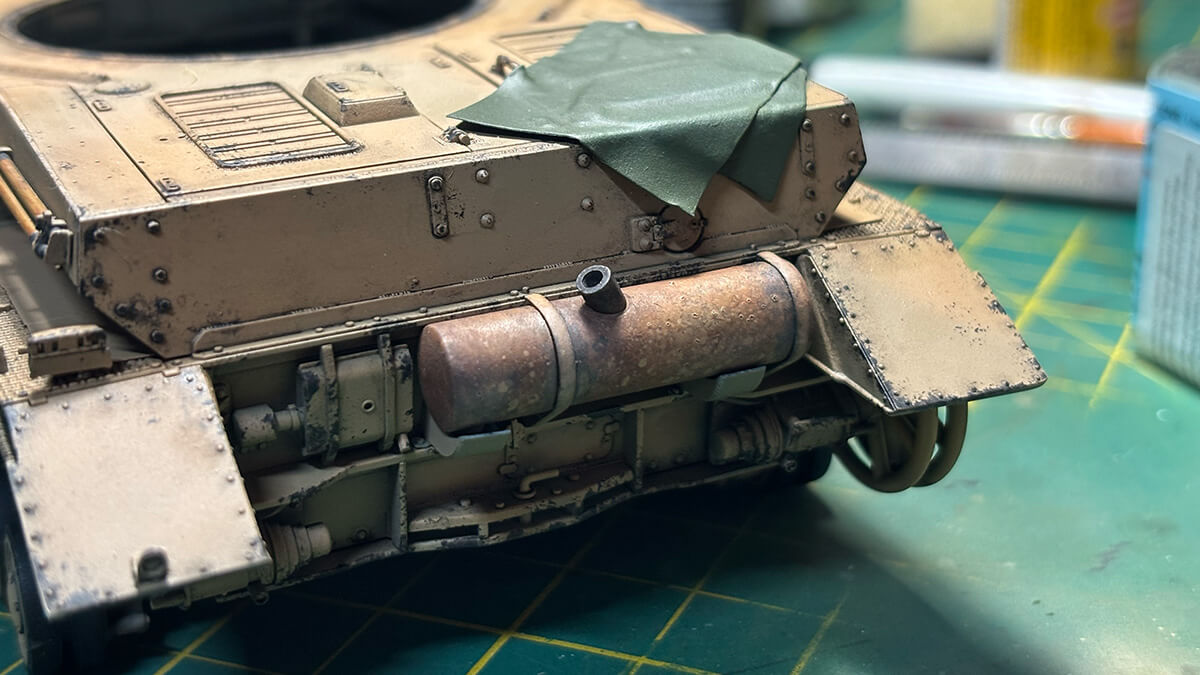
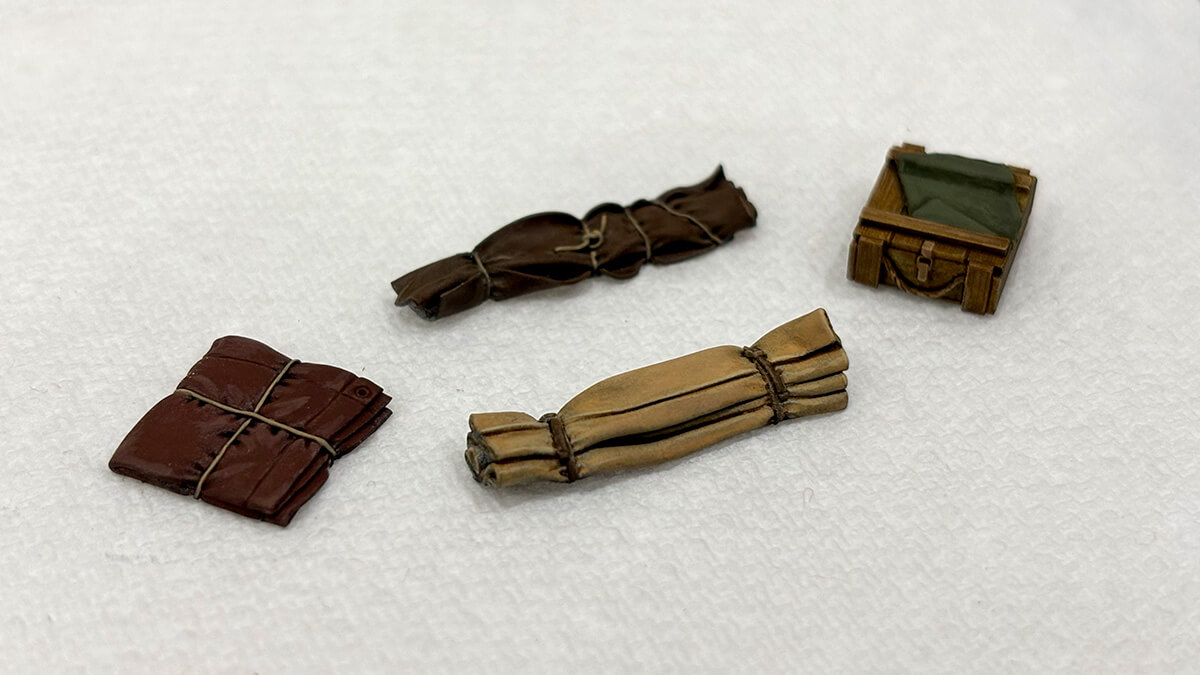
During the build I made my own springs, stowage brackets and tarps to push myself a bit further and really make the tank my own.
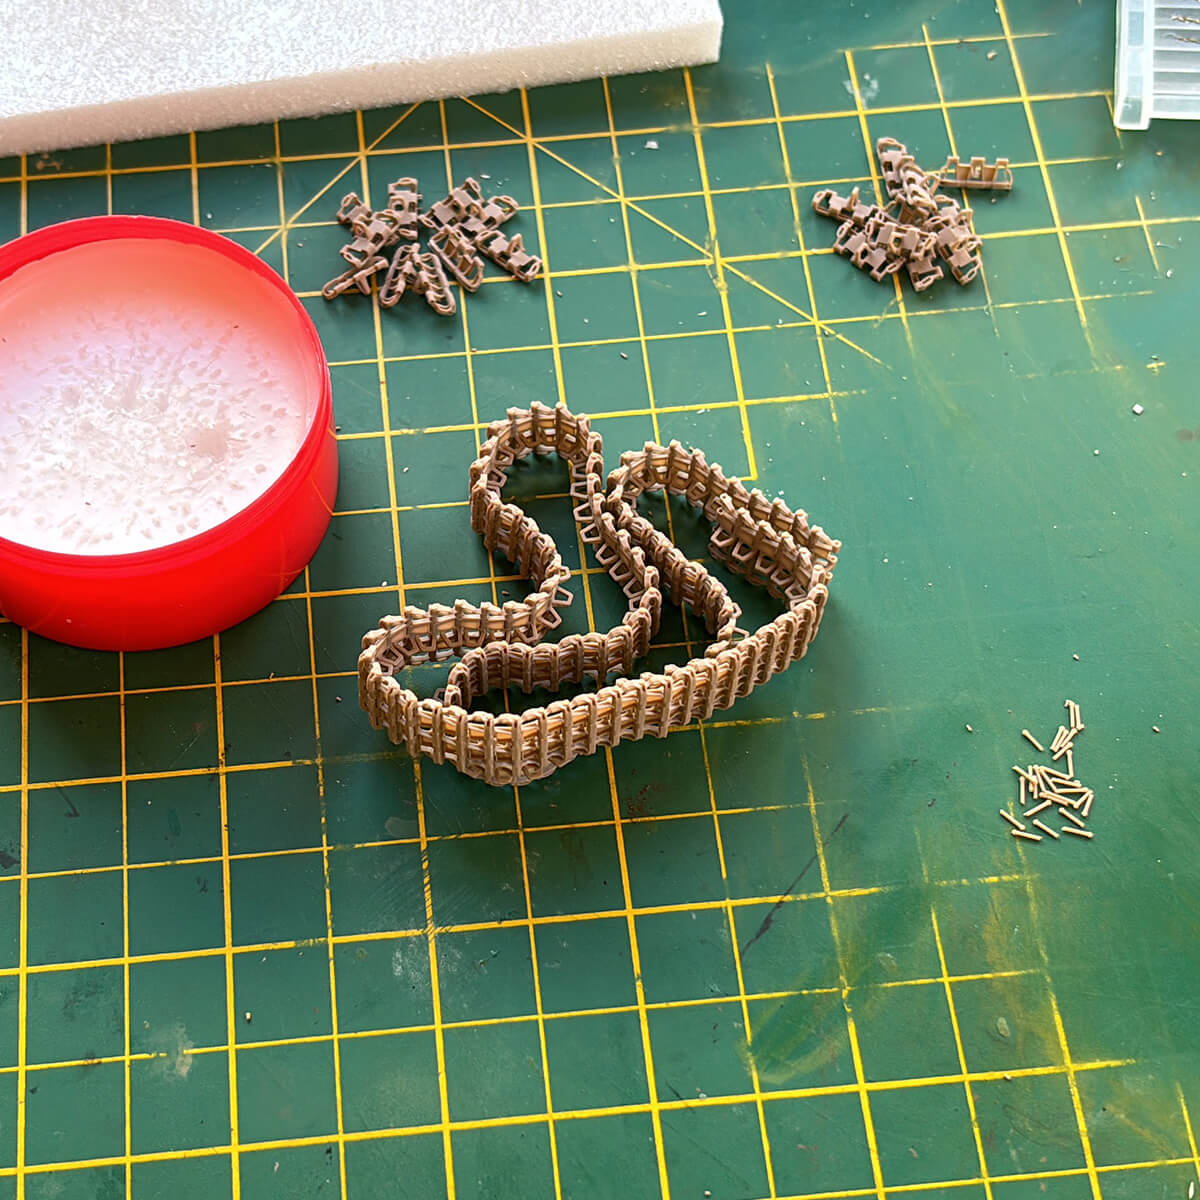
My only complaint with the kit and this is more of a ‘me’ problem is the tracks. It came with the magic tracks and while they look incredible, I just find them difficult to work with. It would have been easier if I’d fitted them before the fenders, something I will consider in future builds for sure. In the end I took the easier, more expansive route out and ordered some workable tracks. Usually I’d go Fruimodel, but as they were closed at the time I thought I’d see how ET Model 3D printed tracks do. I was impressed. They were great quality, very few broken links and little cleanup needed. I used some wax to secure the pins so I could easily disassemble if needed. The only real downside to them was I could just dunk them in black track solution and sand them to easily show wear.
The Painting
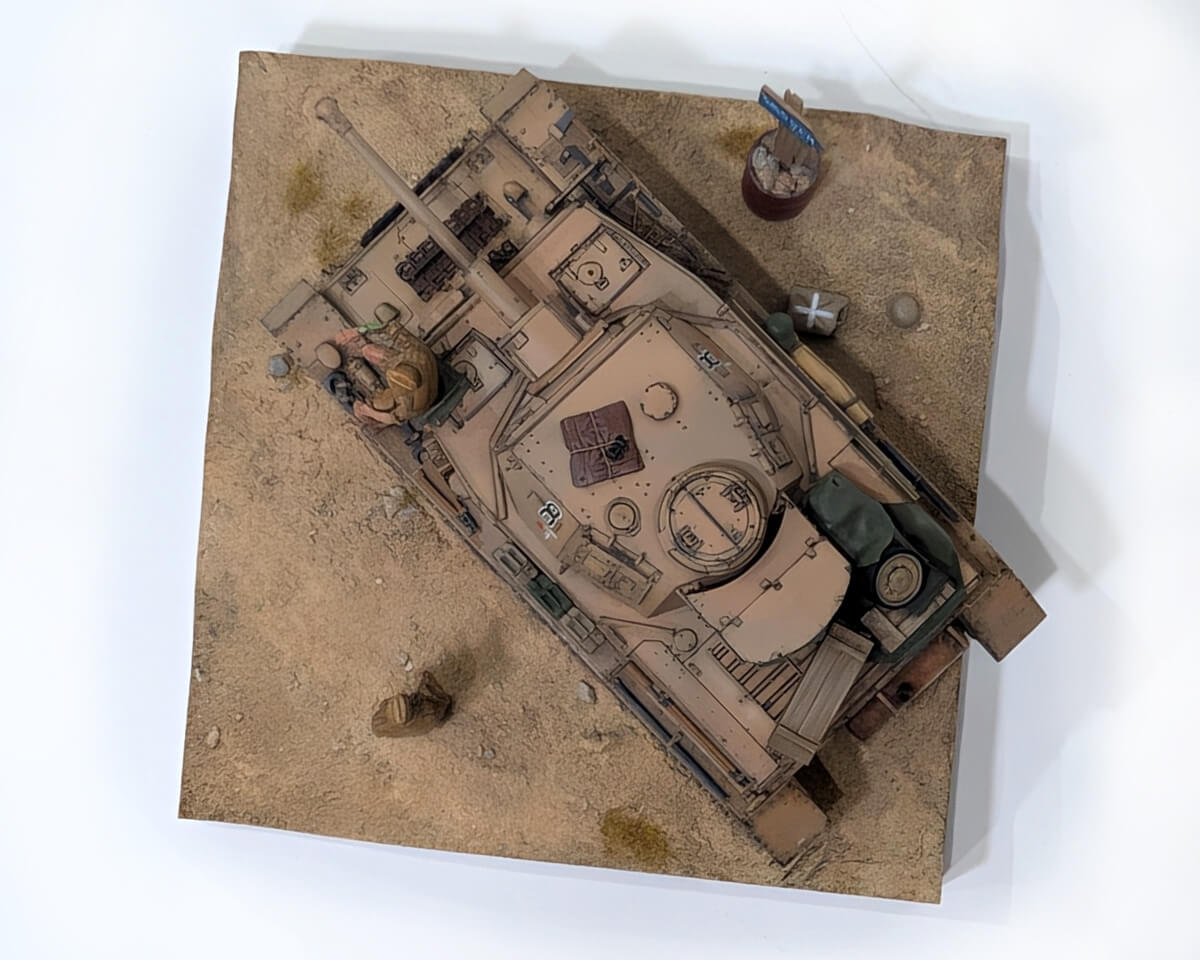
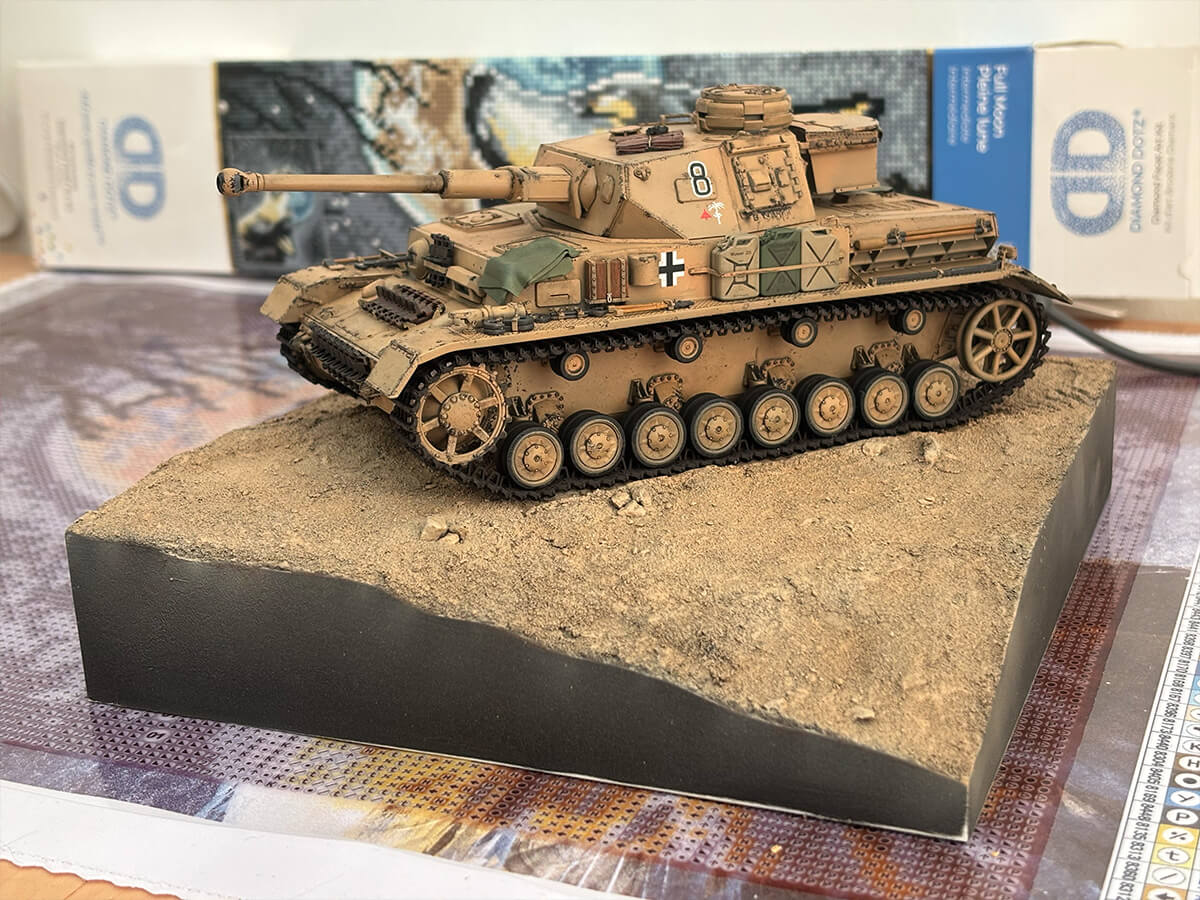
The Tank
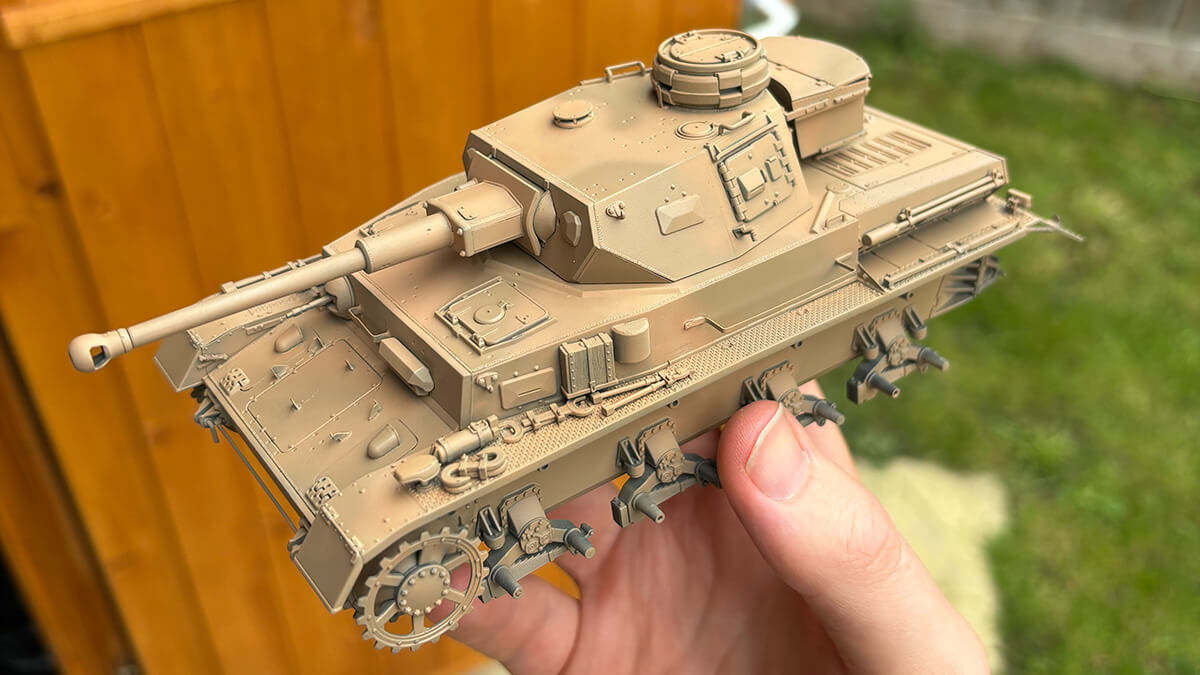
As this was a DAK diorama I was looking to paint this in Tropen 2 camouflage. After a bit of research I found that RAL 8020 and 7027 seemed to make up Tropen 2 and so picked up the equivalent in AK Real Colours.
Step one was to prime the tank. I did this first in black then a coat of Dunlegrau. My original intention was to use chipping fluid for the chips but it went wrong and I chipped through to the bare plastic! This made the dunklegrau coat pointless and meant I needed to approach the chipping another way.
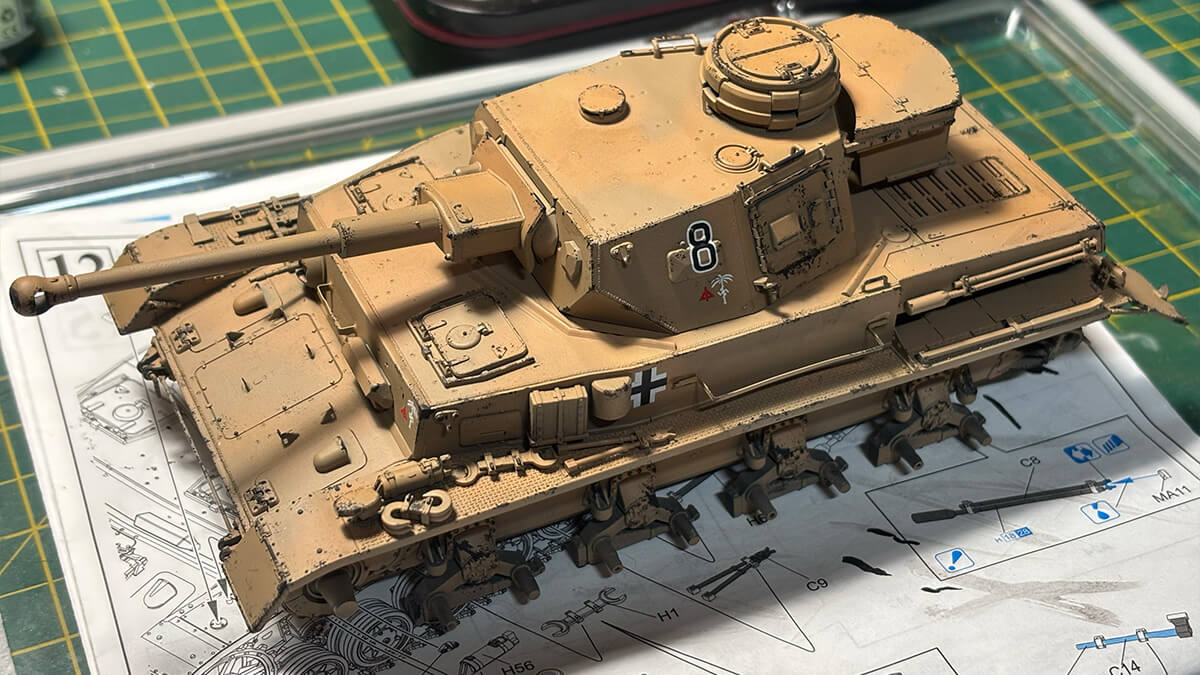
RAL 8020 looked great but I really struggled with 7027. I wasn’t happy with AKs version, it didn’t seem to sit right against the 8020. That might be be not trusting the process and it might have weathered nicely but I just felt like I needed to replace it. So in the end for the 7027 I opted to use MRP (Mr Paint, not to be confused with Mr Colour!). I was much happier with the MRP, though looking at the finished piece it isn’t very obviously a two colour camo scheme so maybe I should have stuck with the AK colour. Either way, I really liked how the MRP paint performed, it is pre thinned so you don’t get as much for your money but it has the convenience and I’d recommend it to new airbrush users as it gives you a good barometer of paint thinning ratios for non MRP paints.

To do the chipping I opted in the end to try VMS chip and nick paint. This paints on and can be easily removed with water. I was impressed with the results, however next time do chipping I'm going to aim for a 2 tone approach to add more depth to the chips.
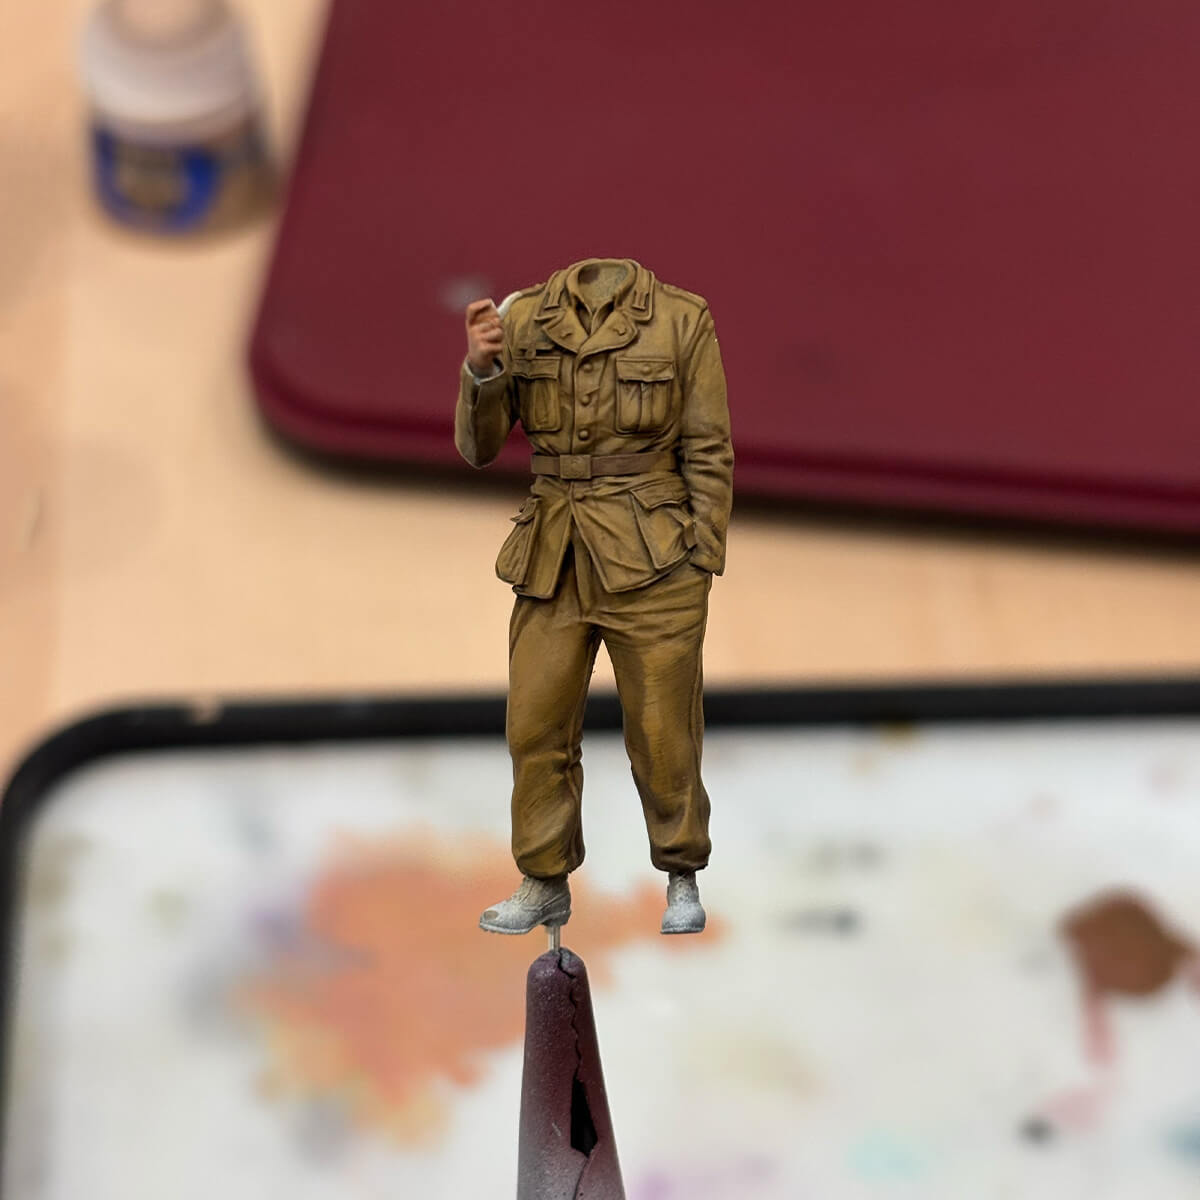
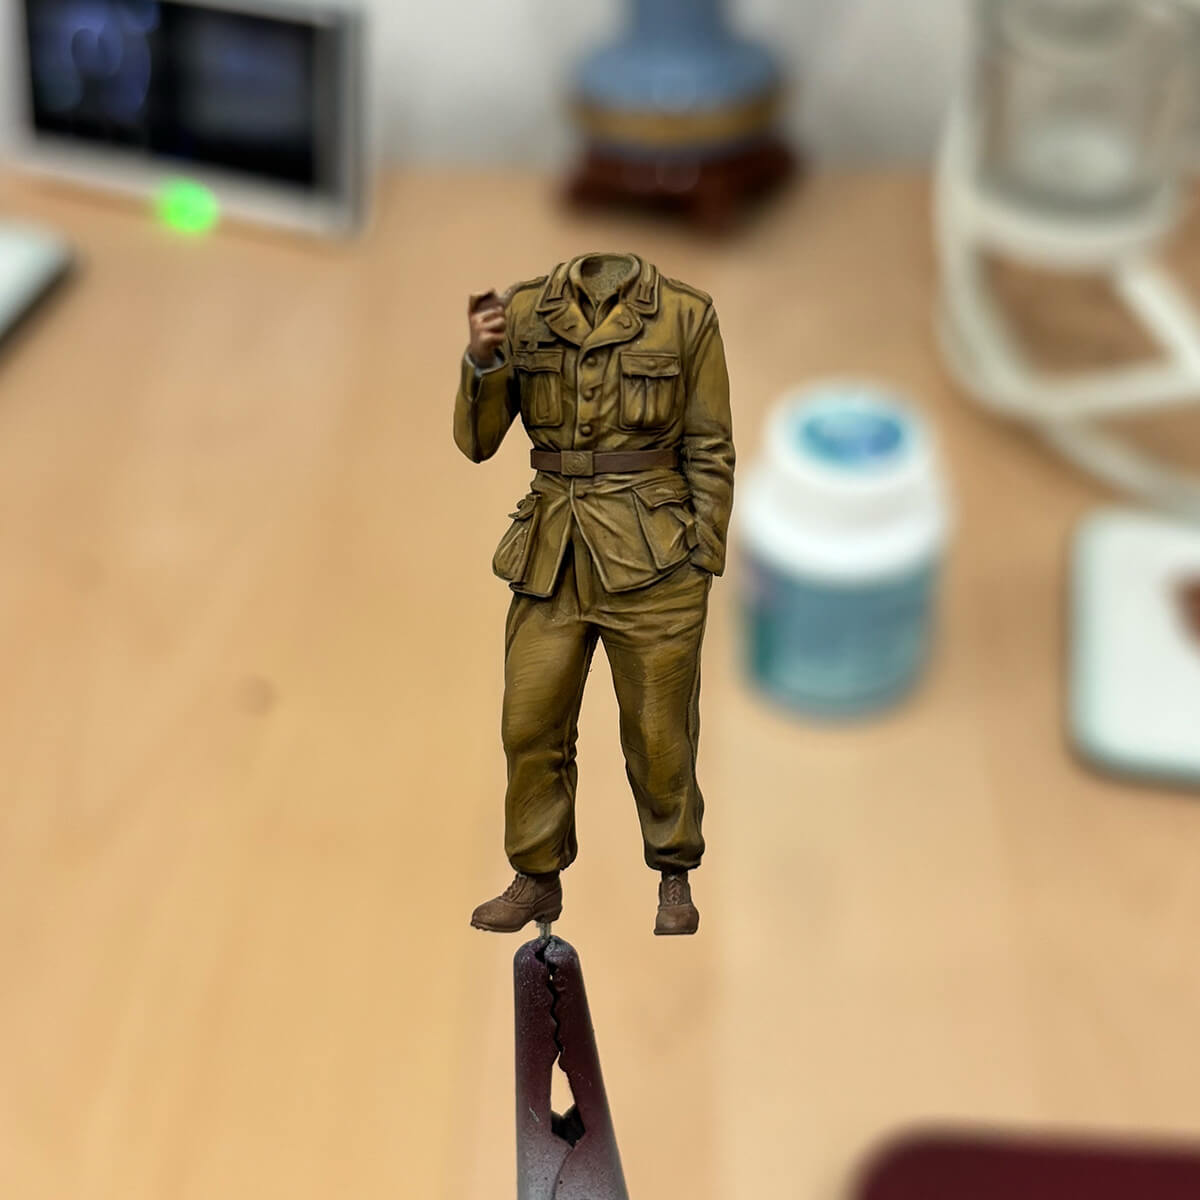
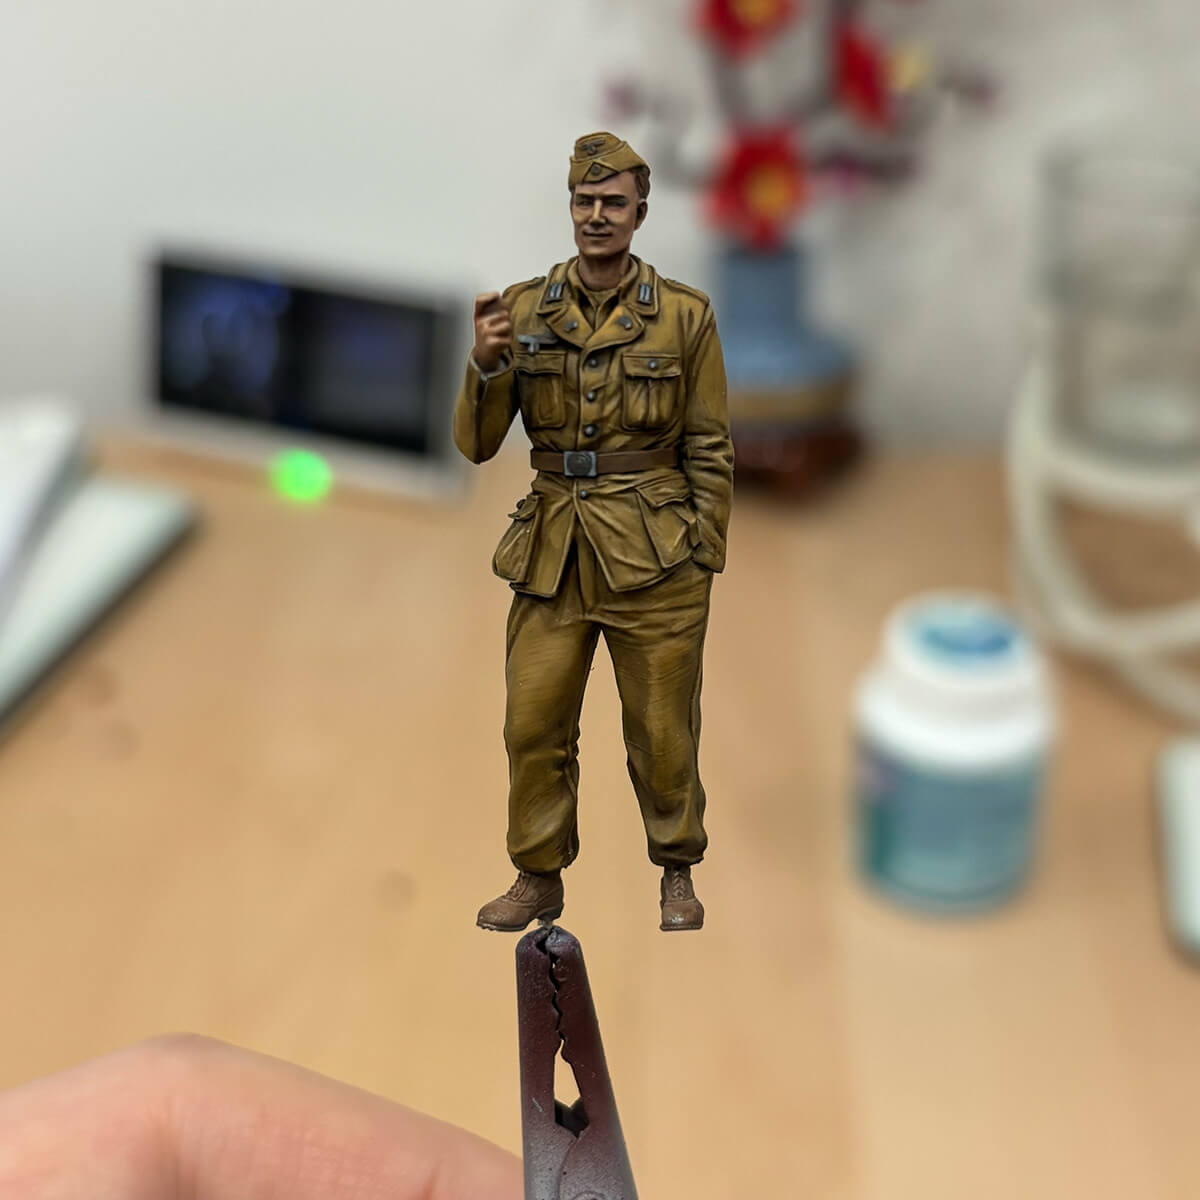
The Figures
I’m very happy with how the figures turned out. I’m seeing improvement in my figure painting from when I worked on the Easy Eight crew. For these my aim was to be as patient as possible and slowly build up the base colour with a series of glazes. Still lots of room for improvement and already looking forward to my next lot of figure painting.
The Diorama
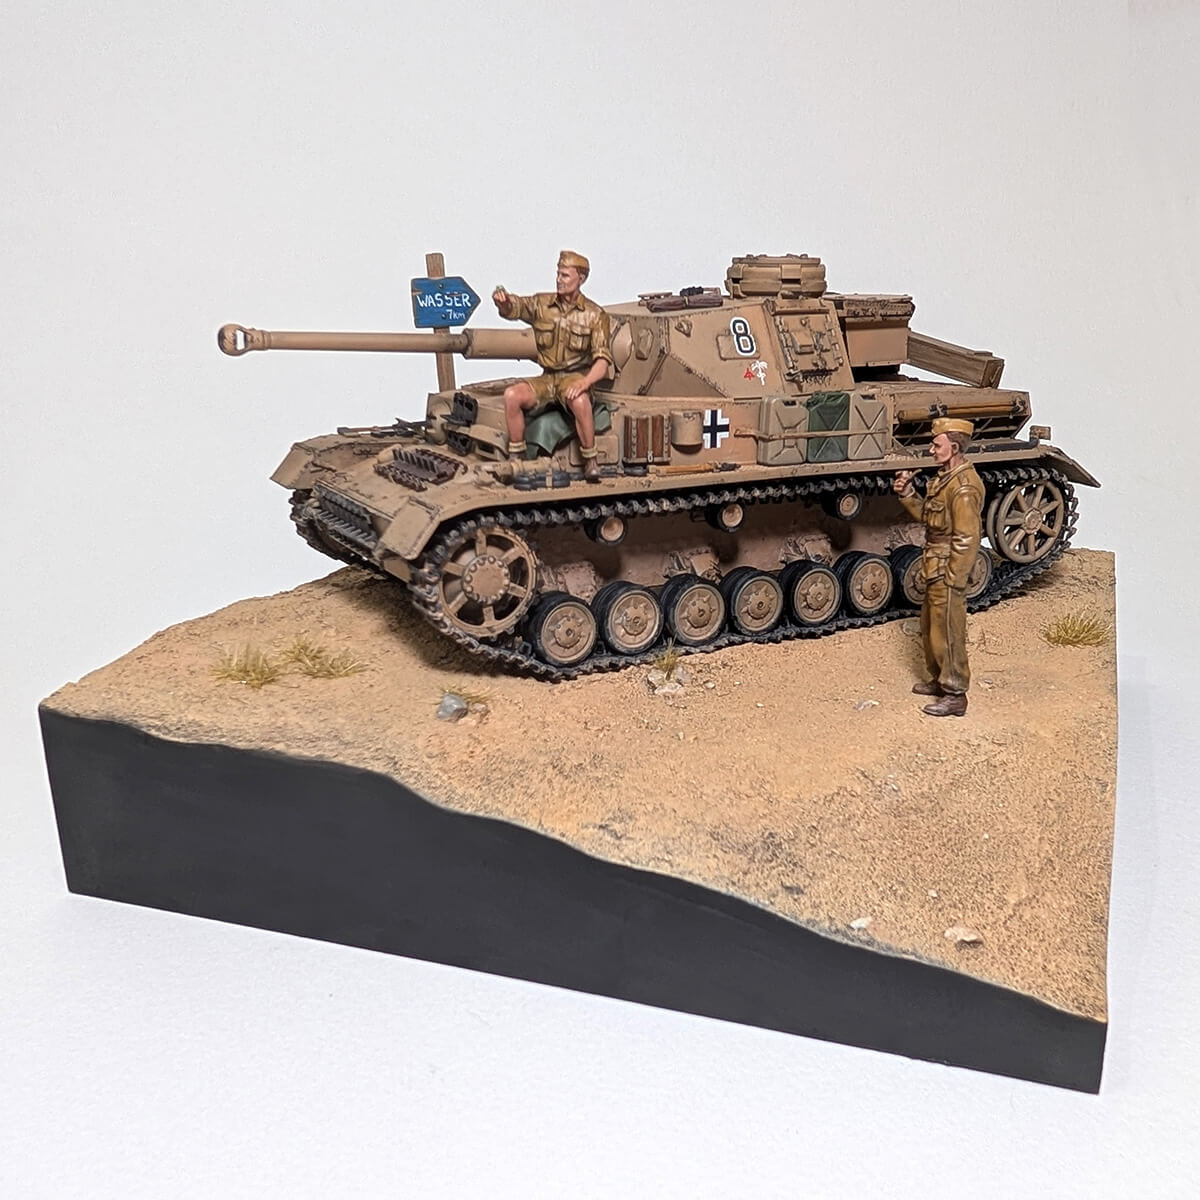
My plan for the Diorama was simple. I wanted a fairly sparse looking area of desert where the general story is the Tank crew are having a break, a little distracted and haven't noticed their only jerry can of water has fallen off the back.
I'm still a little inexperienced in landscaping foam, I found it quite tricky settling on a natural looking terrain. The foam cutter is incredible and makes slicing it up fun and easy, sometimes it is just satisfying watching the wire slice through a stack of foam like a lightsaber!
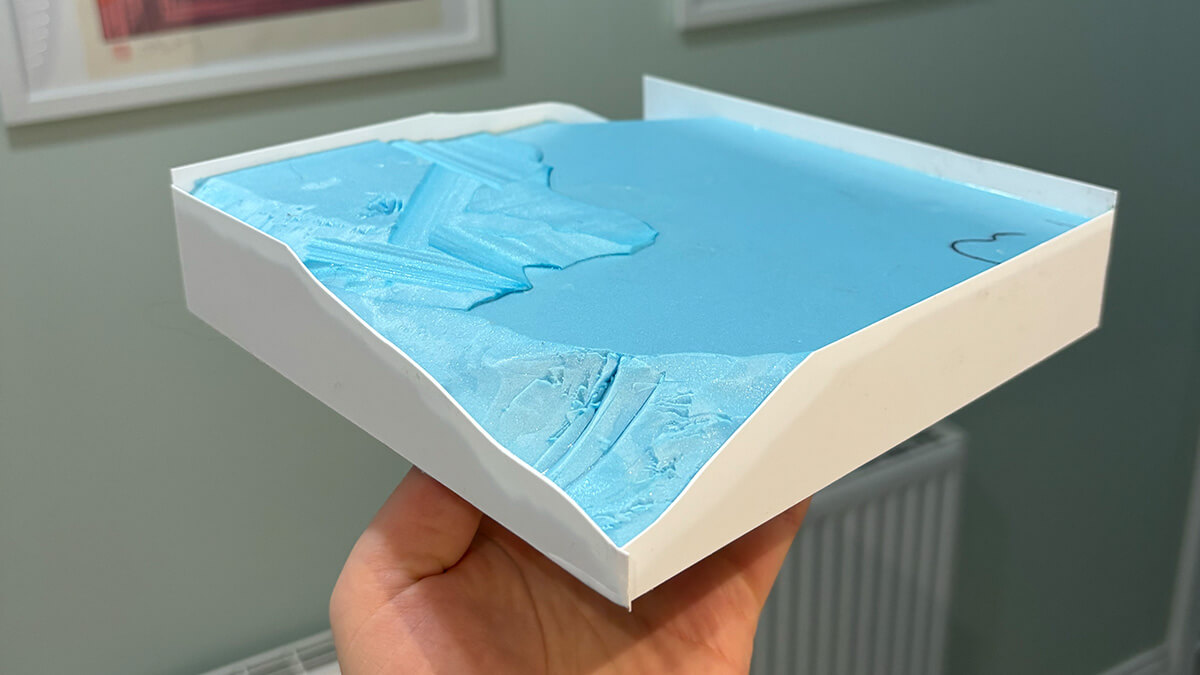
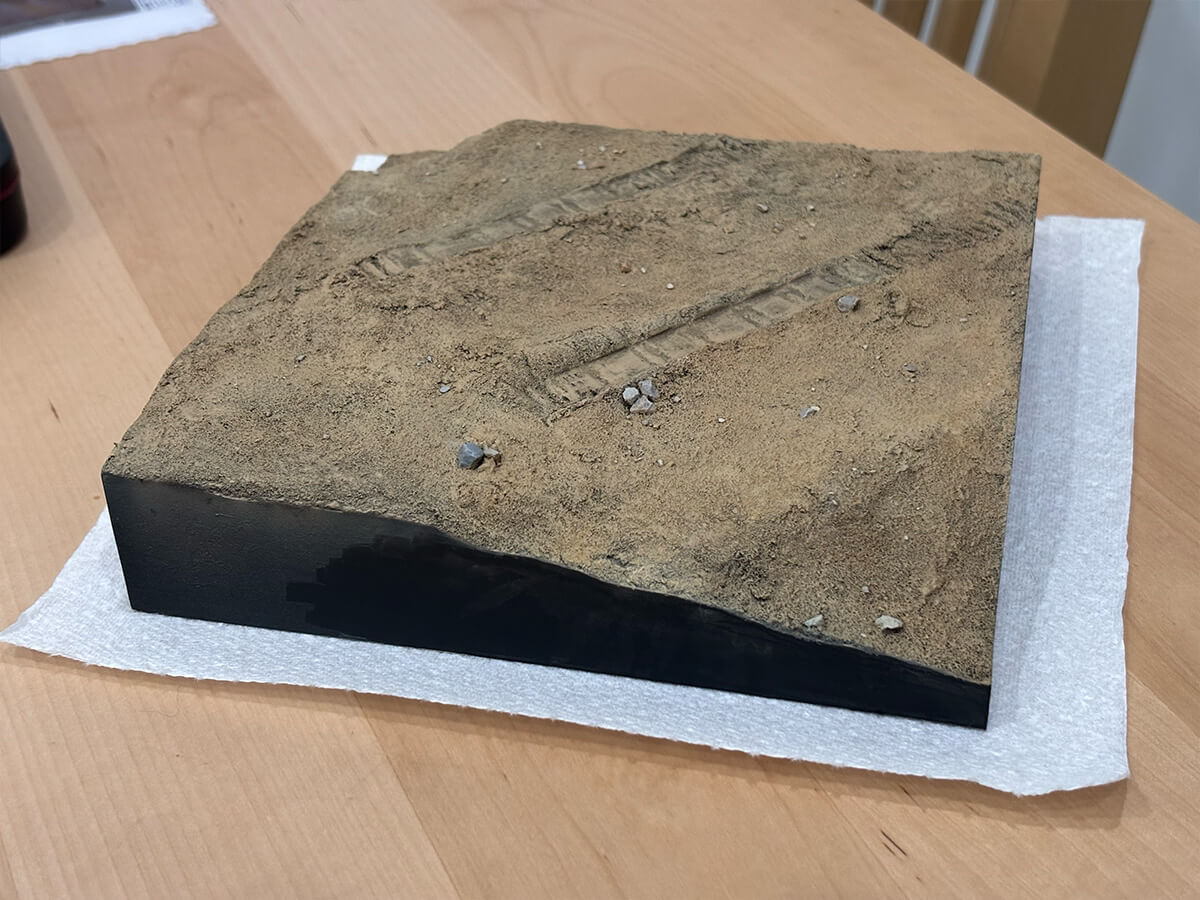
Once I had finally got some foam together into something I was happy with I covered it in some paste to help seal it and give the VMS smart mud something to grip onto. After all the mud was applied I sprinkled lots of tiny stones and placed a few larger ones around, pressed the tank in as much as possible and made some track marks behind it.
Next I sprayed the whole thing black using Mr Surfacer. I can’t quite remember how I built up the colour of the ground, despite doing it twice as I mucked up with some pigments late on and had to spray it all over again. What I can remember was using RAL 8080 as a starting point to help the tank fit in and mixing in buff, and deck tan to highlight areas. I then went in an painted individual stones various shades of stoney colours, added some light earth pigments that I was going to use on the tank, this is where I messed up and went something too light and sandy first time.
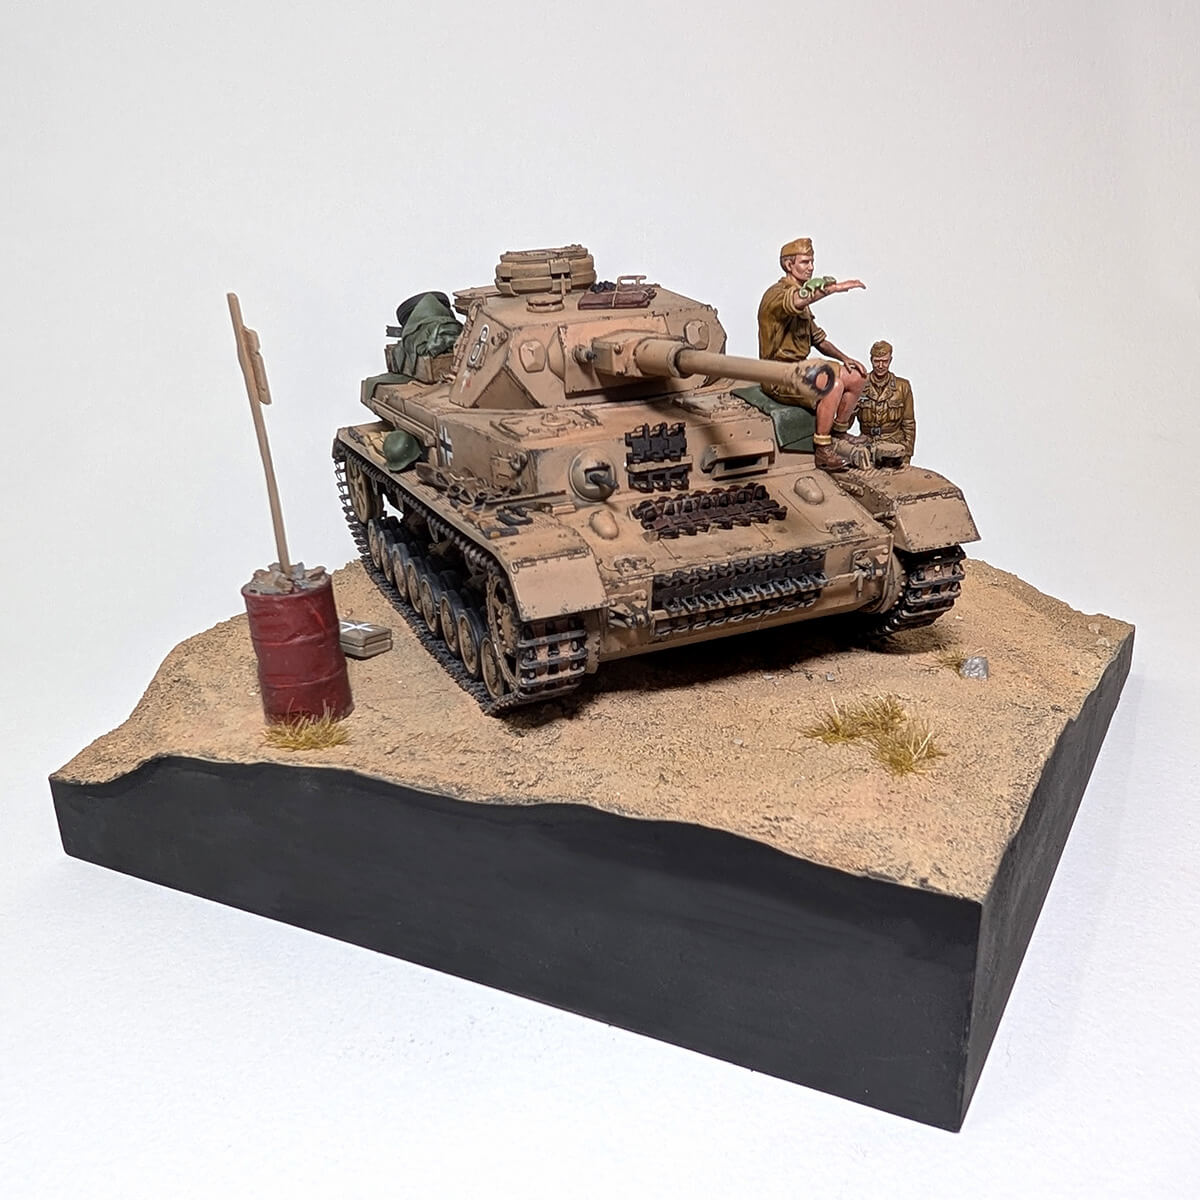
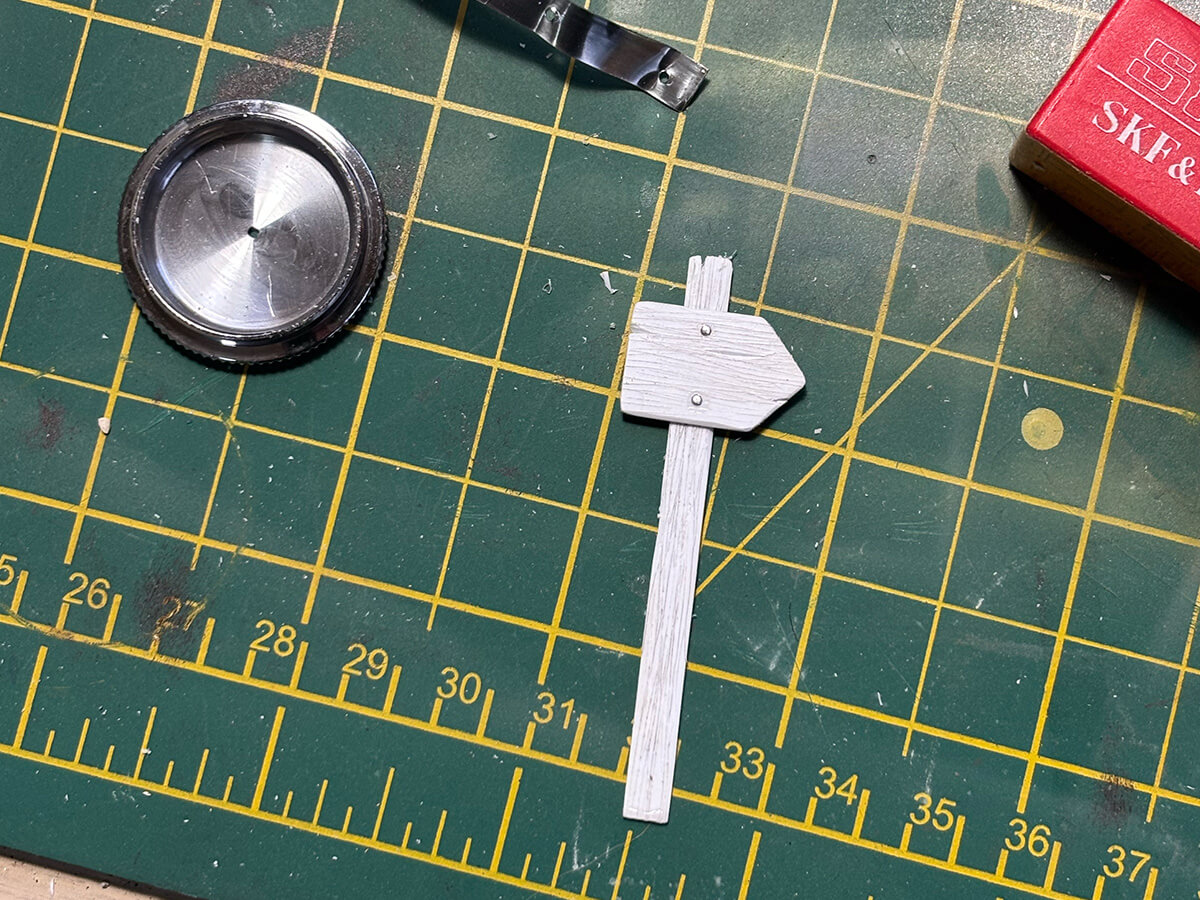
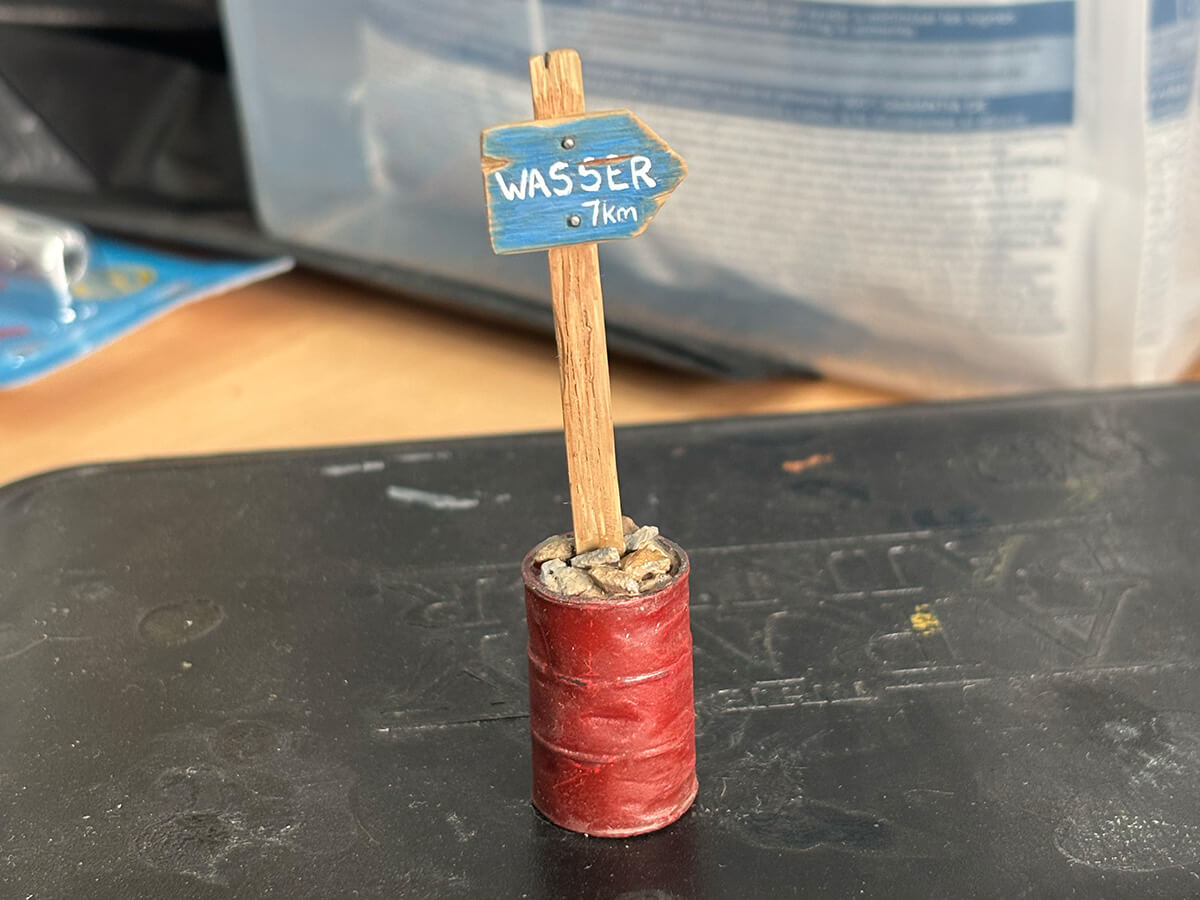
I wanted to add another element, originally maybe a bike of some sort but I don’t think I’d have the room. In the end I had an idea of a sign post and thought I could tie it in with the story. I scratch built a sign using some styrene and punched out a tiny couple of pewter discs to act as nail heads. I then placed the sign in an oil drum that I had originally intended for the Easy Eight. I painted it up and used it as an excuse to add some colour that wasn’t green or an earth tone.
Final Images
Overall I'm really pleased with the final piece. There are certainly areas that could be improved but I feel like it is important to know when to stop and I can look back and use my experience working on this to try make the next diorama even better... and maybe even bigger.